How to hike FASTER!
General Tips
1. Pace
Aim to finish the day walking the same speed at which you started. Think rhythm and flow. Tortoise rather than hare.
2. Pack Adjustments
Regularly make small adjustments to your pack’s harness, hip belt, shoulder and stabilizer straps. Alternate the weight of the load between your shoulders and hips. By fine-tuning your load in such a fashion, you can help to minimize the build up of tightness/stress in any one area.
3. Mix It Up
The same principle of making adjustments to your pack equally applies to your gait. Shorter strides, longer strides, up on your toes, back on your heels. Whatever it takes to minimize muscle tension in particular areas. Think about it – if you are using the same muscles in exactly the same way hour after hour, day after day there are bound to be repercussions. If you are sitting at a computer for long stretches, do your eyes and hands not feel the strain?
4. Stretching
Help keep your muscles supple by doing some light stretching during breaks. In addition, try to do 10-15 minutes at the end of each hiking day. Think of it as an investment in your on-trail health.
5. Breaks
Try keeping them short and regular rather than long and occasional. This allows less time for the muscles to stiffen up, thus making it easier to get going again. This especially holds true for those chronologically challenged amongst us. If you are taking a longer break, particularly on a cold and windy day, consider putting on some warmer clothes so as not to catch a chill.
Uphill
1. Rhythm
Find a rhythm between your breathing and stride. This is most applicable to long gradual uphills on relatively even terrain, where you don’t have to worry too much about foot placement.
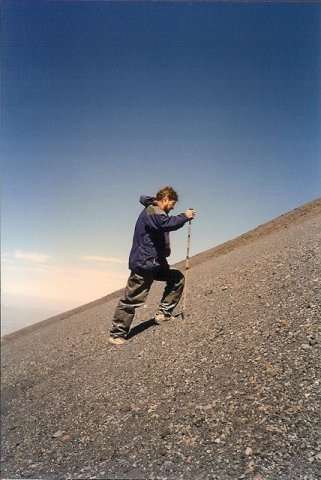
Rolf ascending Volcan Misti | Peru, 1996
2. Breaks
Maintain a steady pace and take fewer breaks, rather than walking faster and having to stop more regularly. By keeping your heartbeat relatively constant rather than subjecting it to dramatic fluctuations, you will expend less energy and cover more distance. Once again, think tortoise rather than hare.
3. Positivity
Focus on positive thoughts, rather than how exhausted you feel. Repeat a mantra or positive expression to yourself over and over. It really does help.
4. Hang Loose
Undo or loosen your hip and sternum straps. If they are too tight they will constrict both your stride and breathing capacity whilst ascending.
5. Zigzagging
To decrease the gradient on very steep ascents, consider zigzagging rather than going straight up.
6. Rest Step
If you are really feeling it on a long, steep ascent, consider using the Rest Step. With each stride forward, lock/straighten your back leg, momentarily shifting the weight on to the joints rather than the muscles (see photo above left | Ascending El Misti Volcano | Peru).
Downhill
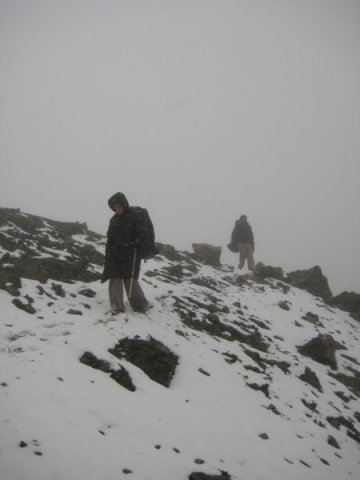
Hiking downhill is often taken for granted.
In the minds of some it represents the equivalent of “backcountry gravy“; the reward that follows the exertion of a long, challenging ascent.
Yet hiking downhill takes its toll. Twists, slips and tumbles are most likely to occur whilst descending and no other type of hiking causes more wear and tear on the joints and muscles.
By learning how to hike downhill efficiently in all types of terrain, the hiker can minimize impact on the body and decrease the probability of falls and/or mishaps occurring.
As a bonus, descending with good technique means that you move faster and feel lighter, without having to put forth any extra physical effort.
Tips for Hiking Downhill
1. Centre of Gravity
Don’t lean forward. Don’t lean back. Your centre of gravity should be low and over your legs.
2. Minimize Stress
Keep your downhill leg slightly bent on impact. This will help minimize stress on the knees, as the muscles rather than the joints take the brunt of the strain.
3. Focus
Pay extra attention to foot placement. Many slips occur on downhill stretches that immediately follow long ascents. After the exertion of the climb, the tendency is “let it all hang out” on the descent, which can subsequently lead to mistakes. Make a mental note to increase your concentration level before beginning downhill sections.
4. Shorter Steps
When the gradient is steep, taking smaller steps will help to keep your centre of gravity over your legs, thus promoting greater balance and control.
5. Hip Belt
On steep, uneven descents it can be helpful to tighten your hip belt. This assists in minimizing pack movement, which can impede your balance if left unchecked.
6. Pack Weight
Travel as light as the dictates of your skillset and the environment into which you are venturing allow. An overly heavy pack will extract its biggest toll on your body during steep and/or long downhill sections.
7. Snow Slopes
How you descend in snowbound terrain is dependant upon the condition of the snow and the gradient of the slope:
- A commonly used technique is the plunge step. Landing heel first, let the weight of your body drive your foot into the snow. The harder the snow, the more aggressive the effort needs to be. Keep your knees slightly bent to avoid hyperextension.
- Hiking poles may help with balance, however if conditions are such that a fall could potentially result in injury, an ice axe and/or traction devices (e.g. Kahtoola Microspikes or crampons) should be used.
- If the snow is simply too solid and you are not appropriately equipped to continue safely, drop your pack, take in the views and treat yourself to a lengthy breakfast whilst waiting for it to soften.
8. Cross Country
When descending a steep slope in trailless, technical terrain:
- Don’t rush.
- “Scope the slope“; aim for the path of least resistance.
- Always stay in control. Constantly monitor your momentum.
- During long descents, identify short term targets (e.g. a large boulder) and move from one to the next.
- When descending a scree slope, take short, controlled steps. Keep your centre of gravity over your legs at all times. If there is someone below you, be sure to give them plenty of space, in case you accidentally dislodge a rock. Alternatively, fan out and descend together.
- When descending talus slopes, even more care should be taken so as not to run the risk of causing a rock slide.
9. Flow
Once you have the necessary technique down pat, stay as loose as possible. Think flow. Move with the terrain, rather than against it.
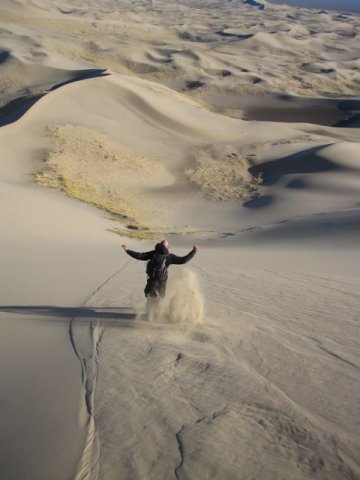
10. Sand Dunes
Big strides, short strides, hoop, holler, throw your arms up in the air! Ever since I was a kid growing up in Australia, sand dunes have always been my favourite type of downhill. There is an incredible feeling of freedom that comes with bounding down a huge sand dune………….it makes me smile just thinking about it.
 ____________________________________________________________________________________
Raiderfit LLC. www.Raiderfit.com (c) 2018 Materials. Fitness and mindset program to prepare candidates to successfully pass special operations selection, swat selection, fire fighter selection and ncaa sports combines. NOT FOR EVERYONE. @Raiderfit #Raiderfit #fitness #specialopsfitness #neverquit #fullspectrumathlete #functionalfitness #crossfit #weightlifting #nutrition #mindset #soffitness #firstresponders #swat #selectionprep #indocprep #budsprep #rsasprep #swatprep #firefighterprep #ncaaprep #d1boundprep #d1bound #footballfitness

